For beginners we recommend a fresh system using our SD image of Raspbian!
This image contains all the things described below.
Be warned that any further update of FHEM or Debian will overwrite eventually our patched kernel and config files for FHEM - making COC look dead or not functional! So check things below after updating!
At the 512MB version board of RPi the connector handles have become very big. The hole provided at the COC is 2.9mm only!! Therefor the handle needs to be removed:
UPDATE: The newest RPi charge even uses a 3mm thick connector. This is about 0.1mm too big for the slot at COC. In case you got one of those RPis you must rasp away some micrometers of COCs slot to make it fit.
Those devices are connected to RPis I2C bus. Therefor you need to update the kernel & modules. Either you just take our pre-compiled kernel or you compile yr own sources after you applied our patches.
Our kernel will also take care of different RPi board revisions and map the I2C pins on extensions header always to bus 0.
The RPi stores its time (by default without RTC) by using /sbin/fake-clock. You should add a line in save-condition:
if test -e /dev/rtc0; then hwclock -w; fi
This will sync the hwclock at least on a reboot or shutdown. Execute hwclock -w manually i.e. after a ntp-sync.
For the sake of the environment, the COC is equipped with a super-capacitor which will last for at least 12 hours of backup once fully charged.
DO NOT INSERT A BATTERY - because you need to disable the RTC charger first!
Be aware that culfw on the COC already uses the DS2482-Onewire chip in a CUNO-fashion. Therefor you should not load the ds2482.ko module unless you have disabled HAS_ONEWIRE in culfw or upload the COC.radio_only.hex firmware - see below!
echo “resetting 868MHz extension…”
if test ! -d /sys/class/gpio/gpio17; then echo 17 > /sys/class/gpio/export; fi
if test ! -d /sys/class/gpio/gpio18; then echo 18 > /sys/class/gpio/export; fi
echo out > /sys/class/gpio/gpio17/direction
echo out > /sys/class/gpio/gpio18/direction
echo 1 > /sys/class/gpio/gpio18/value
echo 0 > /sys/class/gpio/gpio17/value
sleep 1
echo 1 > /sys/class/gpio/gpio17/value
sleep 1


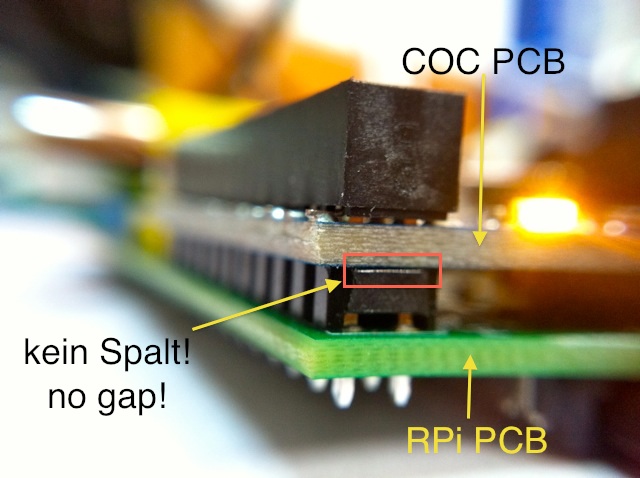 Make sure there is no gap left. Press the two PCB so you can hear/feel a litlle “click” …
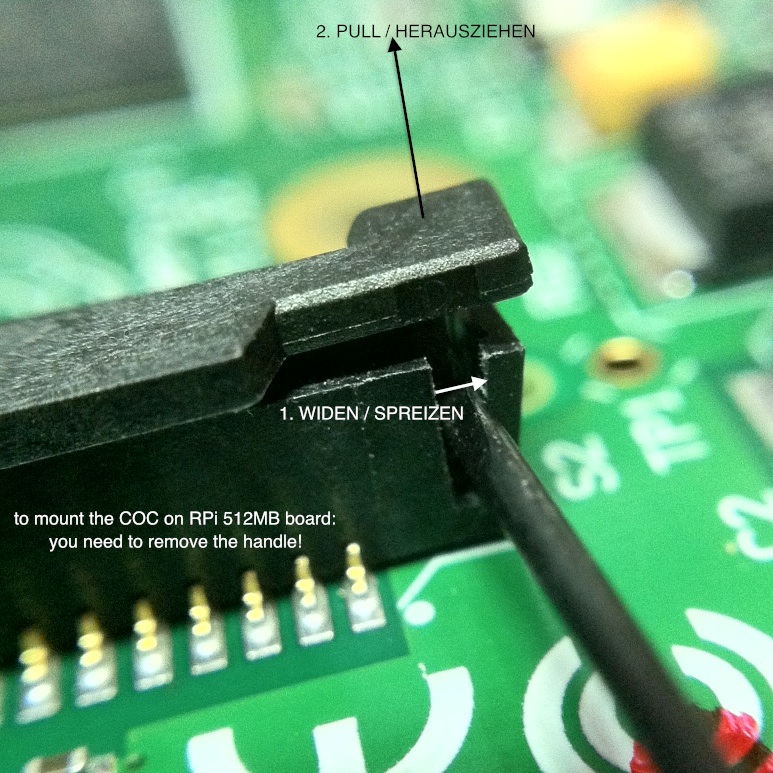 UPDATE: The newest RPi charge even uses a 3mm thick connector. This is about 0.1mm too big for the slot at COC. In case you got one of those RPis you must rasp away some micrometers of COCs slot to make it fit.